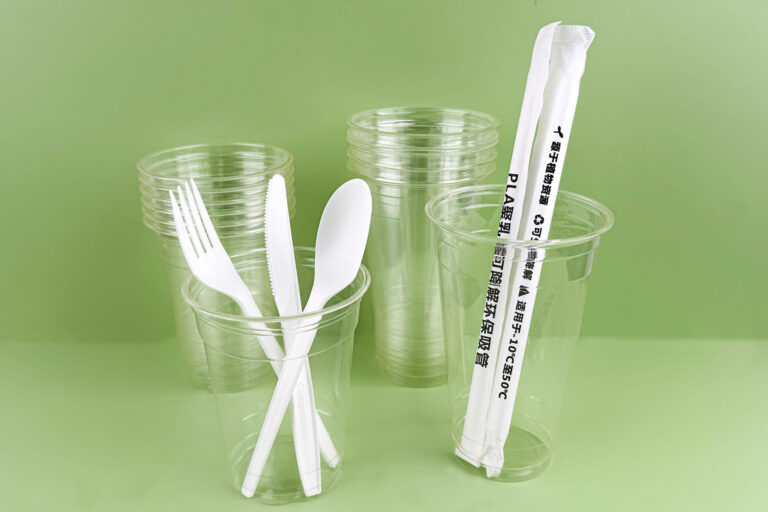
Op maat gemaakte plastic bekers: Hoe u logo-afdrukken kunt vermijden Fa
Op maat gemaakte plastic bekers: Wanneer een Logo Cup een merkaansprakelijkheid wordt
Voor een koffieketen met 200 locaties, de merkbeker is een van de meest kosteneffectieve marketinginstrumenten die ze bezitten. Elke klant die met een logobeker naar buiten loopt, is een wandelend reclamebord. Maar wanneer een inkoopmanager een zending van 200.000 eenheden ontvangt en ontdekt dat het merk groen is veranderd in blauwgroen, of de tekst is van dichtbij wazig – dat is geen marketingmiddel. Dat is een merkaansprakelijkheid die in een magazijn zit.
Dit scenario komt veel vaker voor dan de meeste kopers verwachten. Bij het in bulk bestellen van op maat bedrukte plastic bekers, Bij de kwaliteit van logo's zijn variabelen betrokken die de meeste inkoopteams pas controleren als er iets misgaat. Het goede nieuws: al deze variabelen kunnen worden gecontroleerd als u weet wat u moet vragen voordat de productie begint.
De drie drukprocessen: Wat uw leverancier u niet vertelt
Niet alle op maat bedrukte plastic bekers zijn hetzelfde. De printmethode bepaalt de duurzaamheid, kleurnauwkeurigheid, minimale bestelling praktisch, en kosten per eenheid. De meeste leveranciers zullen standaard de apparatuur gebruiken die ze al hebben – niet noodzakelijkerwijs wat goed is voor uw ontwerp.
Zeefdruk (Zeefdruk)
Zeefdruk duwt inkt door een fijnmazig stencil op het bekeroppervlak. Het is het werkpaard van de bekerindustrie.
Beste voor: Eenvoudige logo's met 1-4 effen kleuren, grote tekst, gedurfde afbeeldingen.
Voordelen: Laagste kosten per eenheid op schaal. Een dikke inktlaag betekent een uitstekende dekking op transparante cups. De kleuren zijn levendig en duurzaam als ze op de juiste manier worden uitgehard.
Beperkingen: Niet geschikt voor fotografische kleurverlopen of fijne details onder 1pt. Voor elke kleur zijn een afzonderlijk scherm en instelkosten vereist, dus complexe ontwerpen worden duur bij lage volumes.
Wat te controleren: Vraag de leverancier om een Pantone-proefdruk op het eigenlijke bekermateriaal, niet op papier. Inkthechting aan HUISDIER en PLA-oppervlakken verschillen fundamenteel van papier. Controleer ook of ze inkt op oplosmiddelbasis of UV-uithardende inkt gebruiken. UV-uithardende inkten bieden over het algemeen een betere wrijfweerstand voor toepassingen met koude dranken waarbij condensatie constant is.
Afdrukken met warmteoverdracht
Bij warmteoverdracht wordt gebruik gemaakt van een bedrukte film die door hitte op de beker wordt geperst, het ontwerp in het oppervlak versmelten.
Beste voor: Fotorealistische afbeeldingen, complexe gradiënten, ontwerpen met meer dan vier kleuren, korte tot middellange runs.
Voordelen: Full-colour fotokwaliteit. Geen instelkosten per kleur. Uitstekende dekking van rand tot rand. Het ontwerp wordt onderdeel van het bekeroppervlak in plaats van er bovenop te zitten.
Beperkingen: Hogere kosten per eenheid dan zeefdruk voor eenvoudige ontwerpen bij grote volumes. De kwaliteit is sterk afhankelijk van de temperatuur- en drukconsistentie tijdens het aanbrengen; variatie in beide levert inconsistente resultaten op over de hele batch.
Wat te controleren: Vraag vanaf het midden van de run een productiemonster aan, niet het begin. Machines voor warmteoverdracht variëren in kalibratie terwijl ze draaien. Vraag ook naar de UV-bestendigheid van de film; bekers die buiten of in het raam worden tentoongesteld, worden voortdurend blootgesteld aan UV, waardoor afdrukken bij warmteoverdracht sneller kunnen vervagen dan zeefdrukinkt.
In-Mold-labeling (IML)
IML plaatst een voorbedrukt label in de mal voordat de cup wordt gevormd, zodat het etiket tijdens het injecteren in de bekerwand versmelt.
Beste voor: Premiummerken die de hoogste duurzaamheid vereisen, vochtbestendige ontwerpen, en een naadloos “no-label-gevoel.”
Voordelen: De print bevindt zich letterlijk in de bekerwand en kan niet krassen, schil, of worden beïnvloed door condensatie. Fotografische kwaliteit. De afgewerkte beker ziet eruit alsof het ontwerp erin is vervaardigd, omdat het zo was.
Beperkingen: Hoogste gereedschapskosten. Alleen praktisch voor zeer grote volumes (typisch 500,000+ eenheden om de matrijskosten af te schrijven). Langere doorlooptijden voor de initiële matrijsfabricage.
Wat te controleren: De matrijs zelf is de grootste investering; inspecteer matrijsmonsters van eerdere opdrachten om de IML-precisie van de leverancier te verifiëren. De tolerantie voor de uitlijning van labels moet in het contract worden gespecificeerd (doorgaans ±0,3 mm voor premium IML).
Pre-productie: De drie bewijsfasen die catastrofes voorkomen
Een enkele miscommunicatie tijdens het proefdrukken is de oorzaak van 90% van op maat gemaakte plastic bekers voor geschillen over printfouten. Zet een gated goedkeuringsproces op dat beide partijen schriftelijk erkennen.
Fase 1: Digitaal bewijs
De leverancier stuurt een digitale mockup waarop uw ontwerp in een 3D-cupweergave wordt weergegeven. Deze fase bevestigt de plaatsing en verhoudingen van het kunstwerk, kleurspecificatie (Pantone-codes, niet “donkergroen”), tekstinhoud en spelling, en registratiemarkeringen en afloopgebieden.
Kritische controle: Controleer of het bestand van uw ontwerper de CMYK-kleurmodus gebruikt, niet RGB. RGB-kleuren op het scherm zien er anders uit wanneer ze worden afgedrukt. Als precieze merkkleuren niet onderhandelbaar zijn, verstrek Pantone Solid Coated-referenties.
Fase 2: Fysiek staalbewijs
De leverancier drukt uw ontwerp af op een vlak monster van het daadwerkelijke bekermateriaal. Dit bevestigt de kleurnauwkeurigheid op het echte substraat (HUISDIER, PLA, PP-oppervlakken absorberen inkt allemaal op een andere manier), inktdekking op transparant materiaal, en de leesbaarheid van fijne details op ware grootte.
Kritische controle: Bekijk het staal onder de lichtomstandigheden die uw klanten zullen zien: fluorescerend magazijn, sfeervol café, zonlicht buiten. Kleuren veranderen dramatisch in de lichtomgeving.
Fase 3: Pre-productiemonster
De leverancier produceert 50-100 afgewerkte bekers van de eigenlijke productielijn voordat de volledige run wordt gestart. Dit bevestigt de printregistratie op een gebogen oppervlak (platte stalen laten geen vervorming zien), productie-snelheid uithardingskwaliteit, en duurzaamheid in de praktijk.
Kritische controle: Onderwerp monsters aan reële gebruiksomstandigheden. Vul met ijswater en controleer daarna 30 minuten condensatie. Wrijf met een vochtige duim over het bedrukte gebied 20 keer. Stapel 20 kopjes en draai de stapel om te controleren of er inkt tussen de kopjes zit.
Drie kwaliteitstests die uw leverancier moet uitvoeren (en deel resultaten voor)
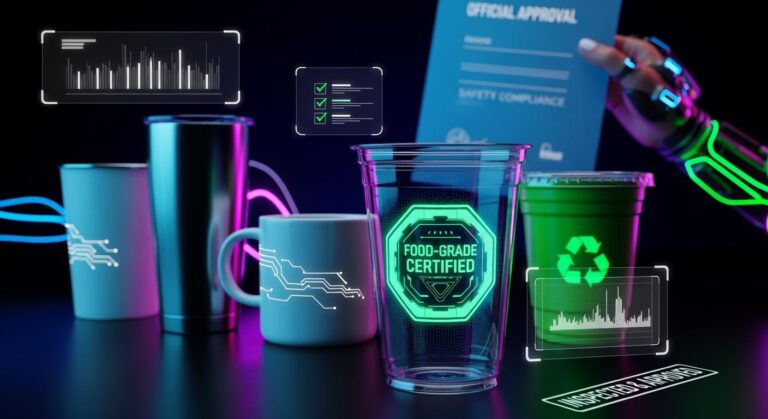
Elke fabriek met ISO-gecertificeerd kwaliteitsmanagement zouden deze tests moeten uitvoeren. Vraag naar de rapporten.
Cross-cut hechtingstest (ISO 2409 / ASTM D3359)
In het bedrukte oppervlak wordt een roosterpatroon gesneden, plakband wordt aangebracht en verwijderd. De test beoordeelt de hechting van 0 (perfect, geen inkt verwijderd) naar 5 (ernstige mislukking). Voor drankbekers, accepteer niets onder de klasse 1.
Rode vlag: Een leverancier die geen hechtingstestrapport of claims kan overleggen “we controleren het gewoon met het oog” kent geen systematische kwaliteitscontrole.
Wrijfweerstandstest (Sutherland-wrijvingstest)
Een verzwaarde arm wrijft een standaard schuurmiddel gedurende een bepaald aantal cycli tegen het bedrukte oppervlak. Dit simuleert maandenlang hanteren en stapelen. Resultaten opvragen voor zowel droogwrijven als natwrijven (condensatie simulatie).
Aanvaardbare drempel: Geen zichtbare inktverwijdering of kleuroverdracht daarna 50 natte cycli.
Versnelde UV-veroudering (QUV-test)
Stelt bedrukte bekers bloot aan intens UV-licht, waardoor maandenlange blootstelling aan zonlicht wordt gesimuleerd. Cruciaal als cups buitenshuis worden gebruikt (evenementen, zwembad, foodtrucks) of weergegeven in zonovergoten ramen.
Aanvaardbare drempel: Kleur verschil (Delta E) onderstaand 3.0 na 200 uur QUV-blootstelling.
In productie: Wat u tijdens het hardlopen moet controleren
Als u of een externe inspecteur aanwezig is tijdens de productie, focus op drie controlepunten:
- Registratie elke afdrukken 2,000 eenheden: Voer een bemonsteringsplan uit – controleer 20 kopjes van elk 2,000 geproduceerd. Meet de positie van het logo ten opzichte van de cuprand en naad. Een drift van zelfs 1 mm over 100,000 kopjes betekent de laatste 20,000 zal zichtbaar uit het midden liggen.
- Inktviscositeit tweemaal per dienst: Zeefdrukinkt wordt dikker naarmate het oplosmiddel verdampt gedurende een dienst van 8 uur. Dikkere inkt produceert zwaarder, donkerdere afdrukken die afwijken van de goedgekeurde proefdruk. Dring aan op logboeken van viscositeitsmetingen.
- Willekeurige bemonstering vóór verzending: Voordat containers worden verzegeld, trek een willekeurige steekproef bij AQL 2.5 (grote gebreken) en AQL 4.0 (kleine gebreken). Grote gebreken zijn onder meer: zichtbare misregistratie, kleur buiten tolerantie, inkt schilfert. Kleine gebreken zijn onder meer: kleine vlekjes, haarlijnvariaties in inktdichtheid.
Wat maakt een fabriek in staat om een consistente kwaliteit van op maat gemaakte plastic bekers te leveren
Voor op maat bedrukte plastic bekers, De fundamenten van de fabriek zijn belangrijker dan verkoopbeloften. De printkwaliteit van een leverancier wordt bepaald door zijn productie-infrastructuur, niet hun bereidheid daartoe “probeer harder” op uw bestelling.
Gecentraliseerde materiaaltoevoersystemen elimineer de variatie in grondstoffen van batch tot batch – kopjes per uur 1 en uur 8 van een ploeg zijn gemaakt van identieke samenstelling, zodat de inkthechting consistent is gedurende de gehele run.
Geautomatiseerde productielijnen met inline vision-inspectie, vangstregistratie drift in realtime, niet na 10,000 er zijn defecte eenheden geproduceerd. Handmatige inspectie kan niet tippen aan de consistentie van cameragebaseerde systemen die op productiesnelheid draaien.
Speciaal matrijs- en schermonderhoud is belangrijker dan de leeftijd van de apparatuur. Een 15 jaar oude zeefpers met gedocumenteerd dagelijks onderhoud levert betere resultaten op dan een gloednieuwe machine die nooit opnieuw wordt gekalibreerd.
Bij Yasitai, 25 Jarenlange gerichte bekerproductie heeft precies deze infrastructuur opgebouwd: gecentraliseerde voeding, geautomatiseerde inline kwaliteitscontrole, en gedocumenteerde onderhoudsprotocollen. Maar nog belangrijker voor internationale kopers, ons BRC A+-certificering betekent dat deze processen jaarlijks worden gecontroleerd door externe inspecteurs – u hoeft niemand op zijn woord te geloven.
Voordat u zich engageert voor een productierun, controleer uw leverancier grondig en vraag hen om u door het kwaliteitscontroleproces van hun op maat bedrukte plastic bekers te leiden - van de inspectie van de inktbon tot de uiteindelijke willekeurige bemonstering. Als het antwoord is “vertrouw ons, wij hebben 20 Jaren van ervaring,” blijf zoeken. Een fabriek die hun proces tot in detail kan uitleggen, is een fabriek die het consistent kan herhalen.